Arch Linux Sway Install Guide
Updated: 2022-04-22
This guide is for installing arch linux (UEFI) with Wayland, Swaywm, Ly desktop launcher, Paru, BTRFS, Subvolumes, Snapper, Snap-pac-grub, Snapshots, Qemu, KVM, Iommu, and Gaming.
Install ISO to USB:
After downloading the latest Arch ISO you will need to install it to a usb using a program like Balena Etcher. Plug the usb into the machine you want to install arch to and boot into the usb.
VM Setup

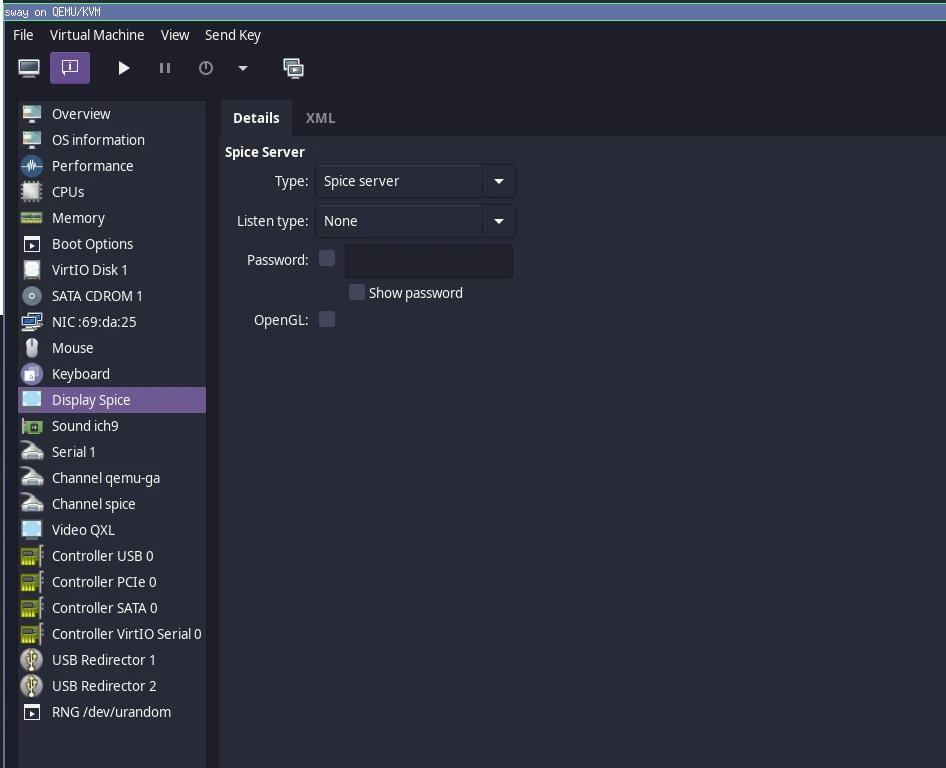
Qemu display settings

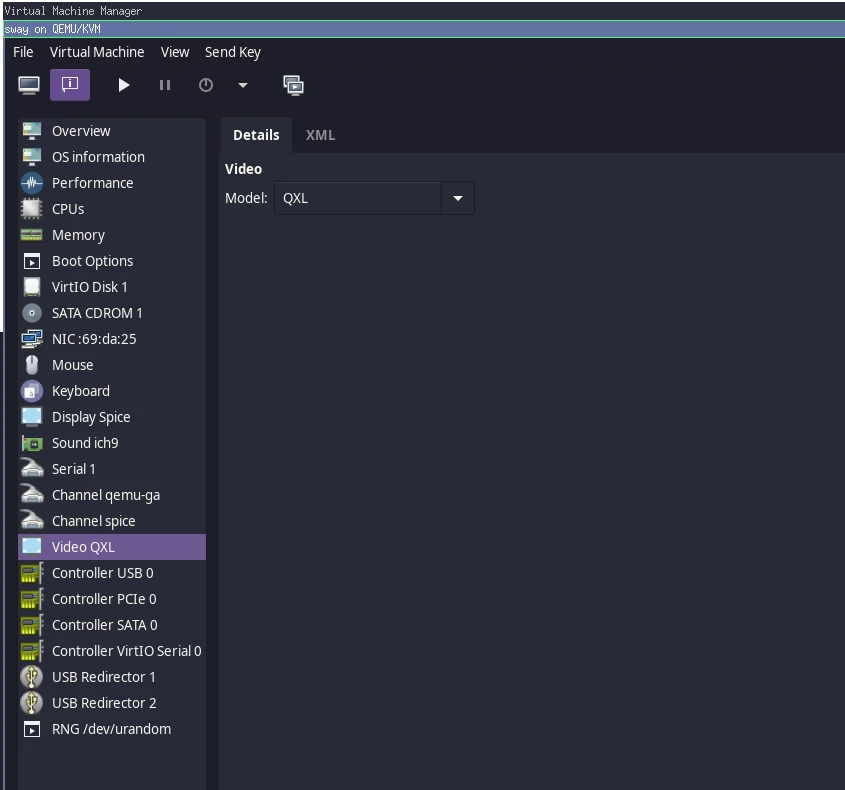
Qemu video settings
Base Install
Give root a password then get the local ip:
passwd

ip address show
SSH into the target machine from your main:
ssh root@xxx.xxx.xxx.xxx
Find your device:
Use lsblk to dyplay your disk information, normally the drive will listed as SDA or SDB.
lsblk
Wipe Existing BTRFS Systems:
gdisk /dev/XXX
Edit Filesystem:
Replace XXX with the target device. Gdisk is for GPT partitions and UEFI, use Fdisk for mbr partitions and bios boot.
gdisk /dev/XXX
Create Boot Partition:
Use the n command to create a new partition on the disk, use the default partition number, use the default first sector, offset the last sector by 512M, and give it a efi flag of ef00.
n

default

default

+512M

ef00
Create Swap Partition (Optional):
We will instead use zramd from the aur or zram-generator from the main repo at a later point
Create Main Partition And Write Changes:
Use the n command to create a new partition on the disk, use the default partition number, use the default first sector, since we are using the remainder of the disk we can use the default last sector, and use the default flag for linux filesystem.
n

default

default

-1G (leave space at end for ssd)

default

w

y
Setup Partition Filesystems And Subvolumes:
If you skipped the swap partition then skip the mkswap and swapon and use the right partition number for the btrfs volume.
mkfs.vfat /dev/vda1 #Can also use mkfs.fat -F32 /dev/xxxx

mkfs.btrfs /dev/vda2

mount /dev/vda2 /mnt

cd /mnt

btrfs su cr @

btrfs su cr @home

btrfs su cr @snapshots

btrfs su cr @var_log

cd ..
BTRFS Raids Side Note (TODO: INVESTIGATE):
mkfs.btrfs -m raid1 -d raid1 /dev/vdaX /dev/vdaY
Remount Partitions Individually:
In order to setup the systems fstab we need to remount the partitions individually with the proper settings.
Use lsblk to verify all partitions and volumes were mounted.
umount /mnt

mount -o noatime,compress=zstd,space_cache=v2,discard=async,subvol=@ /dev/vda2 /mnt

mkdir -p /mnt/{boot,home,.snapshots,var/log}

mount -o noatime,compress=zstd,space_cache=v2,discard=async,subvol=@home /dev/vda2 /mnt/home

mount -o noatime,compress=zstd,space_cache=v2,discard=async,subvol=@snapshots /dev/vda2 /mnt/.snapshots

mount -o noatime,compress=zstd,space_cache=v2,discard=async,subvol=@var_log /dev/vda2 /mnt/var/log

mount /dev/vda1 /mnt/boot

lsblk
Add desired packages (May have error about missing file fsck.btrfs):
Choose your base: linux, linux-lts, linux-zen.
Choose your ucode: intel-ucode, amd-ucode.
pacstrap /mnt base linux-zen linux-zen-headers linux-firmware intel-ucode amd-ucode btrfs-progs nano reflector git rsync sudo
Generate fstab:
genfstab -U /mnt >> /mnt/etc/fstab
Enter system:
arch-chroot /mnt
Setup System Time:
timedatectl list-timezones | grep Toronto

ln -sf /usr/share/zoneinfo/America/Toronto /etc/localtime

hwclock --systohc
Update the timezone:
timedatectl set-ntp true
Setup Locale Generator:
nano /etc/locale.gen
Uncomment your desired locales
en_CA.UTF-8
en_US.UTF-8
Generate Locale:
locale-gen
Update Keymap:
nano /etc/vconsole.conf
KEYMAP=us
Update Mirrors:
#reflector -c Canada -c US -a 6 --sort rate --save /etc/pacman.d/mirrorlist

reflector --country Canada,USA --age 12 --protocol https --sort rate --save /etc/pacman.d/mirrorlist

pacman -Syy
Create Locale Config:
nano /etc/locale.conf
Insert you chosen language from step 16
LANG=en_US.UTF-8
Create Hostname File:
nano /etc/hostname
NAME
Setup Hosts:
nano /etc/hosts
Add the following entries replacing NAME with your hostname
127.0.0.1       localhost
::1             localhost
127.0.1.1       NAME.localdomain NAME
Set Root Password For Actual System:
passwd
Enable Multilib:
This will allow us to install steam, wine, and lutris
Edit the pacman configuration
nano /etc/pacman.conf
uncomment Multilib and the include
[multilib]
Include = /etc/pacman.d/mirrorlist
update system:
pacman -Syu
Create User:
useradd -mG wheel NAME

passwd NAME
Allow Wheel As Root:
EDITOR=nano visudo
Uncomment the following
%wheel ALL=(ALL:ALL) ALL
Install Packages:
avahi is for dns service discovery
gvfs is gnome virtual filesystem
xdg helps apps integrade with the desktop
cups is printer support
mtools provides dos file support
acpi provides power support
ipset maintain set of ips for firewall
fish is an alternative to bash
ntfs-3g is an open source MS NTFS implementation
iptables-nft is a modern version of iptables, ok to replace
WARNING xdg-desktop-portal will request a repo for xdg-desktop-portal-impl, choose the wlr version.
WARNING choose Y to remove iptables
pacman -S xdg-desktop-portal base-devel grub grub-btrfs efibootmgr networkmanager network-manager-applet dialog avahi gvfs gvfs-smb nfs-utils cifs-utils ntfs-3g inetutils dnsutils mtools dosfstools snapper snap-pac xdg-utils xdg-user-dirs alsa-utils usbutils openssh grub-customizer os-prober cups acpi acpi_call acpid iptables-nft ipset firewalld nss-mdns bash-completion fish archlinux-keyring wofi hwinfo

systemctl enable NetworkManager
systemctl enable cups.service
systemctl enable sshd
systemctl enable avahi-daemon
systemctl enable reflector.timer
systemctl enable fstrim.timer
systemctl enable firewalld
systemctl enable acpid
Audio:
pacman -S sof-firmware pipewire pipewire-jack pipewire-alsa pipewire-pulse pipewire-media-session pavucontrol
Laptop extras:
tlp is for battery power saving
pacman -S wpa_supplicant tlp

systemctl enable tlp
Bluetooth extras:
pacman -S bluez bluez-utils

systemctl enable bluetooth
VM:
pacman -S virt-manager qemu qemu-arch-extra vde2 bridge-utils dnsmasq openbsd-netcat

systemctl enable libvirtd
systemctl enable virtlogd.socket
Graphics:
Nouveu:
pacman -S mesa lib32-mesa
Nvidia (Unsupported on sway):
pacman -S nvidia nvidia-utils nvidia-settings nvidia-dkms
AMD:
pacman -S mesa lib32-mesa vulkan-radeon
Setup CPIO Modules And Hooks:
nano /etc/mkinitcpio.conf
Insert btrfs and other items into the brackets for modules.
Virtualization:
vfio_pci vfio vfio_iommu_type1 vfio_virqfdNouveau:
nouveauAmd:
amdgpuNvidia:
nvidia
Ensure modconf is in hooks and uncomment zstd compression
# MODULES
# The following modules are loaded before any boot hooks are
# run.  Advanced users may wish to specify all system modules
# in this array.  For instance:
MODULES=(vfio_pci vfio vfio_iommu_type1 vfio_virqfd btrfs nvidia)

##   This setup specifies all modules in the MODULES setting above.
##   No raid, lvm2, or encrypted root is needed.
#    HOOKS=(base)
#
##   This setup will autodetect all modules for your system and should
##   work as a sane default
#    HOOKS=(base udev autodetect block filesystems)
HOOKS=(base udev autodetect modconf block filesystems keyboard fsck)

# COMPRESSION
# Use this to compress the initramfs image. By default, gzip compression
# is used. Use 'cat' to create an uncompressed image.
COMPRESSION="zstd"
#COMPRESSION="gzip"
#COMPRESSION="bzip2"
#COMPRESSION="lzma"
#COMPRESSION="xz"
#COMPRESSION="lzop"
#COMPRESSION="lz4"
run mkinit for the chosen kernel (linux, linux-lts, linux-zen)
mkinitcpio -p linux-zen
Istall Grub:
Grub is the system that will locate and boot any os on your drive.
grub-install --target=x86_64-efi --efi-directory=/boot --bootloader-id=GRUB
Open grub config
nano /etc/default/grub
Add iommu for system into GRUB_CMDLINE_LINUX_DEFAULT section.
Amd: amd_iommu=on This doesn’t seem to be required on newer hardware…
Intel: intel_iommu=on
Passthrough: iommu=pt
VM: video=1920x1080 Or the desired resolution
GRUB_CMDLINE_LINUX_DEFAULT="quiet intel_iommu=on iommu=pt loglevel=3 nowatchdog"
GRUB_CMDLINE_LINUX=""
Update grub
grub-mkconfig -o /boot/grub/grub.cfg
Finish Setup And Reboot:
exit

umount -a

reboot
Desktop and Usability
SSH Into Machine As New User:
ssh NAME@xxx.xxx.xxx.xxx
Access AUR with Paru:
The arch user repository has some handy GUI packages for interacting with snapshots.
There are a few options for accessing the aur (I prefer paru).
cd /tmp

git clone https://aur.archlinux.org/paru.git

cd paru

makepkg -si

cd ~
Setup fonts and icons:
paru -S nerd-fonts-complete

sudo pacman -S arc-icon-theme
Setup zram:
paru -S zramd
Edit the config for your setup
sudo nano /etc/default/zramd
# Max total swap size in MB
 MAX_SIZE=8192

# Number of zram devices to create
 NUM_DEVICES=1
sudo systemctl enable --now zramd.service
Fix Snapshots:
This step allows the non root user to manage all the snapshots
sudo umount /.snapshots

sudo rm -r /.snapshots

sudo snapper -c root create-config /

sudo btrfs su del /.snapshots

sudo mkdir /.snapshots

sudo mount -a

sudo chmod 750 /.snapshots

sudo chmod a+rx /.snapshots

sudo chown :NAME /.snapshots
Setup Snapper:
sudo nano /etc/snapper/configs/root
Make the following changes based on preference, and make sure to add the new user to the allowed list.
ALLOW_USERS="NAME"
TIMELINE_LIMIT_HOURLY="5"
TIMELINE_LIMIT_DAILY="7"
TIMELINE_LIMIT_WEEKLY="0"
TIMELINE_LIMIT_MONTHLY="0"
TIMELINE_LIMIT_YEARLY="0"
Snapper is what creates the btrfs snapshots allowing us to roll back changes.
sudo systemctl enable --now snapper-timeline.timer

sudo systemctl enable --now snapper-cleanup.timer
paru -S snap-pac-grub snapper-gui
Setup Pacman Hooks For Snapper:
sudo mkdir /etc/pacman.d/hooks

sudo nano /etc/pacman.d/hooks/50-bootbackup.hook
Paste in the hook information.
[Trigger]
Operation = Upgrade
Operation = Install
Operation = Remove
Type = Path
Target = usr/lib/modules/*/vmlinuz

[Action]
Depends = rsync
Description = Backing up /boot...
When = PostTransaction
Exec = /usr/bin/rsync -a --delete /boot /.bootbackup
Install Sway + DE:
obs-studio-tytan652 has better plugins packaged vs obs from main
wlrobs wlrobs is an obs-studio plugin that allows you to screen capture on wlroots based wayland compositors
sudo pacman -S sway waybar wofi xorg-xwayland thunar firefox neofetch starship code keepassxc gnome-keyring libsecret xfce4-settings lsd exa btop nextcloud-client mako swaybg lm_sensors xfce4-settings steam wine-staging lutris wine-mono discord mousepad bat gvfs-mtp tumbler thunar-volman thunar-archive-plugin thunar-media-tags-plugin

paru -S ly-git dmenu-wayland-git wezterm jellyfin-media-player haruna proton proton-ge-custom protonup-qt betterdiscord-installer obs-studio-tytan652 mangohud gimp swayimg swaync swaylock-effects wlrobs wpaperd wlogout jmtpfs autotiling

sudo systemctl enable ly.service

swaylock-effects dracula theme
Set Env Variables:
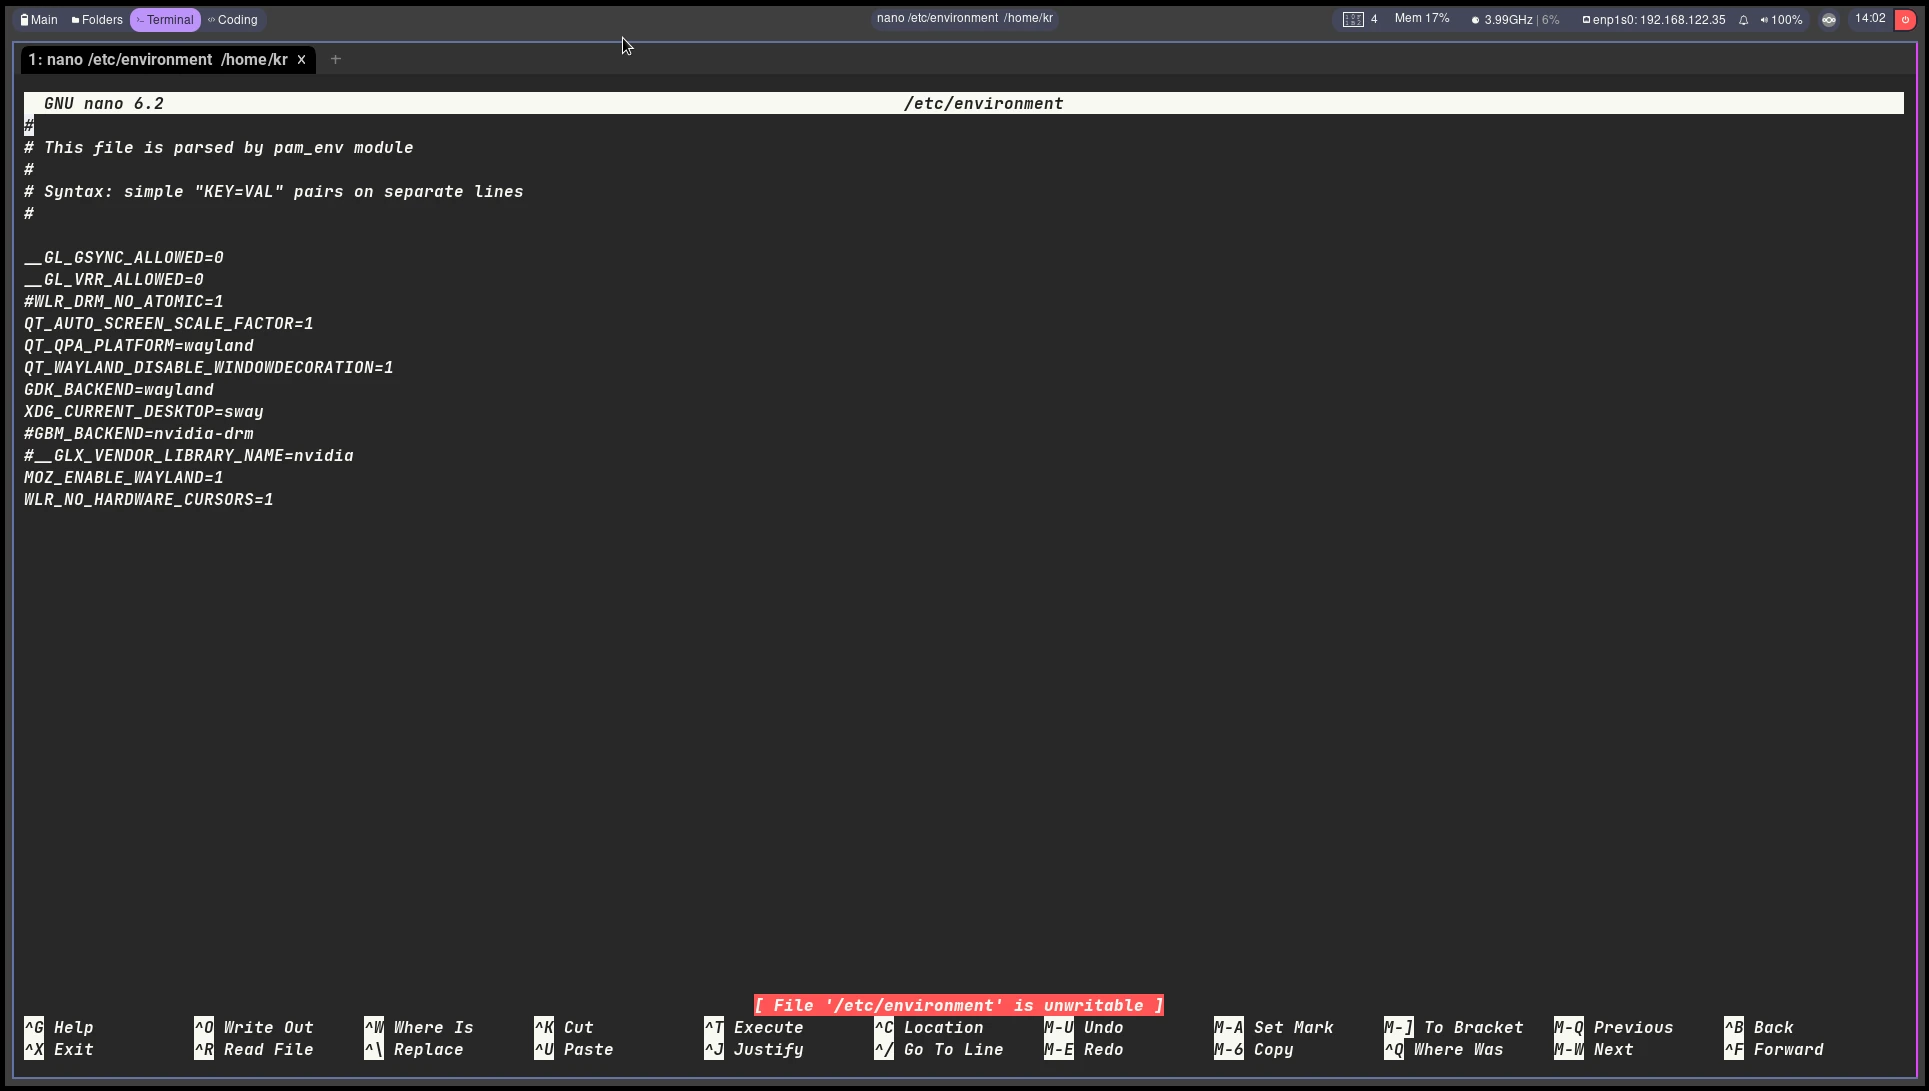
Some of these are for improving vm experiences others for nvidia users, add them to /etc/environment
sudo nano /etc/environment
__GL_GSYNC_ALLOWED=0 #VM no gl passed through
__GL_VRR_ALLOWED=0 #VM no gl passed through
#WLR_DRM_NO_ATOMIC=1 #Unknown, causes flicker in VM
QT_AUTO_SCREEN_SCALE_FACTOR=1
QT_QPA_PLATFORM=wayland
QT_WAYLAND_DISABLE_WINDOWDECORATION=1
GDK_BACKEND=wayland
#GTK_USE_PORTAL=0 #Fix GTK apps delayed open, alt use is in config for sway
XDG_CURRENT_DESKTOP=sway
GBM_BACKEND=nvidia-drm #If using nvidia card
__GLX_VENDOR_LIBRARY_NAME=nvidia #If using nvidia card
MOZ_ENABLE_WAYLAND=1 #This is if you choose not to use xorg-xwayland
WLR_NO_HARDWARE_CURSORS=1 #This is to show the cursor in my VM

Sway env variables
Set Theme:
gsettings set org.gnome.desktop.interface gtk-theme 'Dracula'

gsettings set org.gnome.desktop.wm.preferences theme 'Dracula'

gsettings set org.gnome.desktop.interface icon-theme 'Dracula'
COPY CONFIGS FROM GIT (Optional):
These are my own mashed together configs, mostly from my i3wm system. There are also some backgrounds in the repo.
git clone https://github.com/rassweiler/dotfiles.git && cd dotfiles && ./install
Overwrite the .config and .local folders in your user directory and reboot the system.(The repo now uses dotbot to symlink all configs)
Set Shell:
the default is bash, I prefer fish… but know that some commands will need to be changed to run in fish.
Example Bash/zsh:chsh -s $(which fish) vs fish: chsh -s (which zsh)
chsh -s $(which fish)
Install Extra Audio Packages:
paru -S carla noise-repellent calf
Update User:
Adding the user to the audio and video groups may not be necessary, this was done for gaming with multiple xorg servers.
sudo usermod -aG audio NAME

sudo usermod -aG video NAME

sudo usermod -aG libvirt NAME
Gaming Extras For Wine/Lutris:
sudo pacman -S winetricks
Extra wine packages
sudo pacman -S giflib lib32-giflib libpng lib32-libpng libldap lib32-libldap gnutls lib32-gnutls mpg123 lib32-mpg123 openal lib32-openal v4l-utils lib32-v4l-utils libpulse lib32-libpulse alsa-plugins lib32-alsa-plugins alsa-lib lib32-alsa-lib libjpeg-turbo lib32-libjpeg-turbo libxcomposite lib32-libxcomposite libxinerama lib32-libxinerama ncurses lib32-ncurses opencl-icd-loader lib32-opencl-icd-loader libxslt lib32-libxslt libva lib32-libva gtk3 lib32-gtk3 gst-plugins-base-libs lib32-gst-plugins-base-libs vulkan-icd-loader lib32-vulkan-icd-loader samba dosbox
Generate SSH Key And add To Agent:
ssh-keygen -t ed25519 -C "your_email@example.com"

eval (ssh-agent -c)

ssh-add ~/.ssh/id_ed25519
Setup Libvirtd:
sudo nano /etc/libvirt/libvirtd.conf
Set group to use libvirt with 770 permissions
# Set the UNIX domain socket group ownership. This can be used to
# allow a 'trusted' set of users access to management capabilities
# without becoming root.
#
# This setting is not required or honoured if using systemd socket
# activation.
#
# This is restricted to 'root' by default.
unix_sock_group = "libvirt"

# Set the UNIX socket permissions for the R/W socket. This is used
# for full management of VMs
#
# This setting is not required or honoured if using systemd socket
# activation.
#
# Default allows only root. If PolicyKit is enabled on the socket,
# the default will change to allow everyone (eg, 0777)
#
# If not using PolicyKit and setting group ownership for access
# control, then you may want to relax this too.
unix_sock_rw_perms = "0770"
